
Drupal and Wordpress are both content management systems (CMS). While they function to display web content in a meaningful and organized way, they are fundamentally different. This document will give an overview of each system as it pertains to adding and updating content on your website. Both CMSs are available to faculty, staff and students. You can use them to display your research, student groups, symposiums, or anything school related.
Which CMS is available for me to use?
Drupal and Wordpress are both available to use for faculty and staff.
If you would like to use Wordpress, you can create an account by browsing to Rice University Blogs.
If you would like to use Drupal, send an email to the Rice Help Desk and submit a request to have a website created.
Preparations for your website
In preparation for your website, it’s good to have a solid plan. Listed below are some:
What is the the URL for your website?
The shorter the better. Initially, for Wordpress, it will be yoursitename.blogs.rice.edu. But we can update it to remove “blogs” from the web address. Drupal on the other hand will automatically be yoursitename.rice.edu.
Sitemap: Organizing the pages on your website
It’s good to have a solid plan on what you’re going to display on your website. Start by writing down the pages you intend to create.
For example, a classic research website will have the following pages:
- Homepage
- About
- Contact
- Research A
- Research B
- Research C
- Published Papers
- Research Assistance/Staff
Wordpress
Approximately 35% of the Web uses WordPress so you’ve most likely browsed to a site using it. Wordpress has what are called “page builders” making it entirely easy to create attention-grabbing webpages. Rice University has made available the use of page-builder called DIVI Builder that come with over 100 pre-designed layout packs.
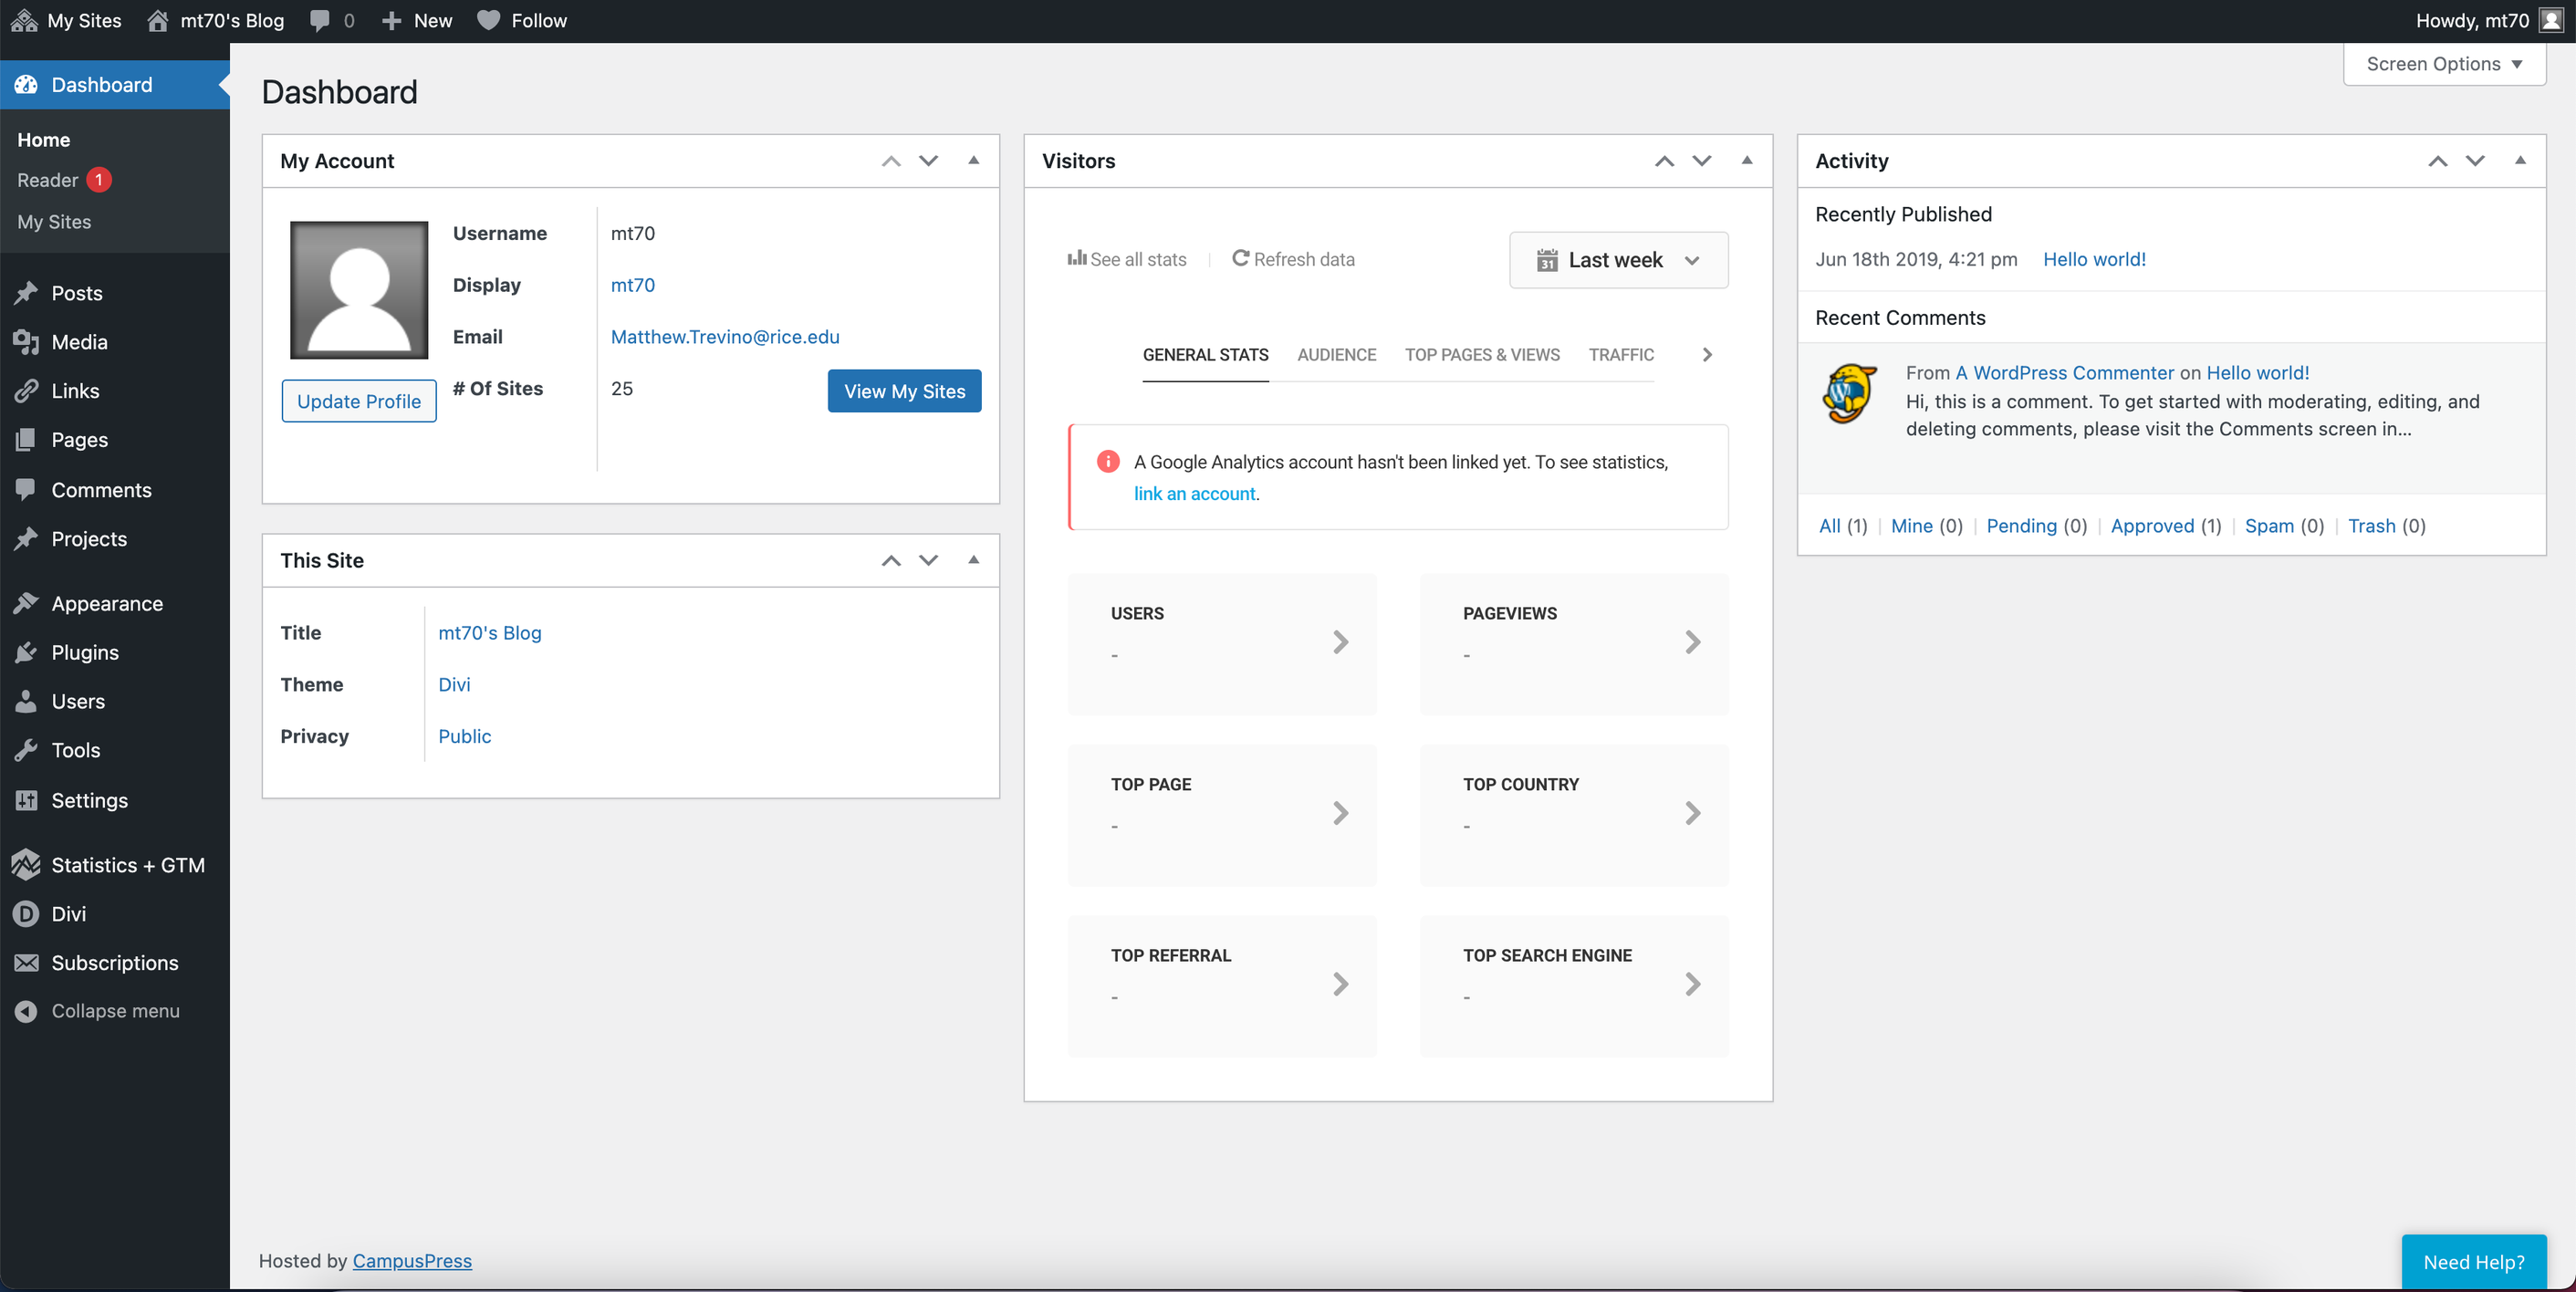
From your Wordpress dashboard, you have a bird's eye view of Google Analytics (which you can setup later with a Google Account) and any recent changes.
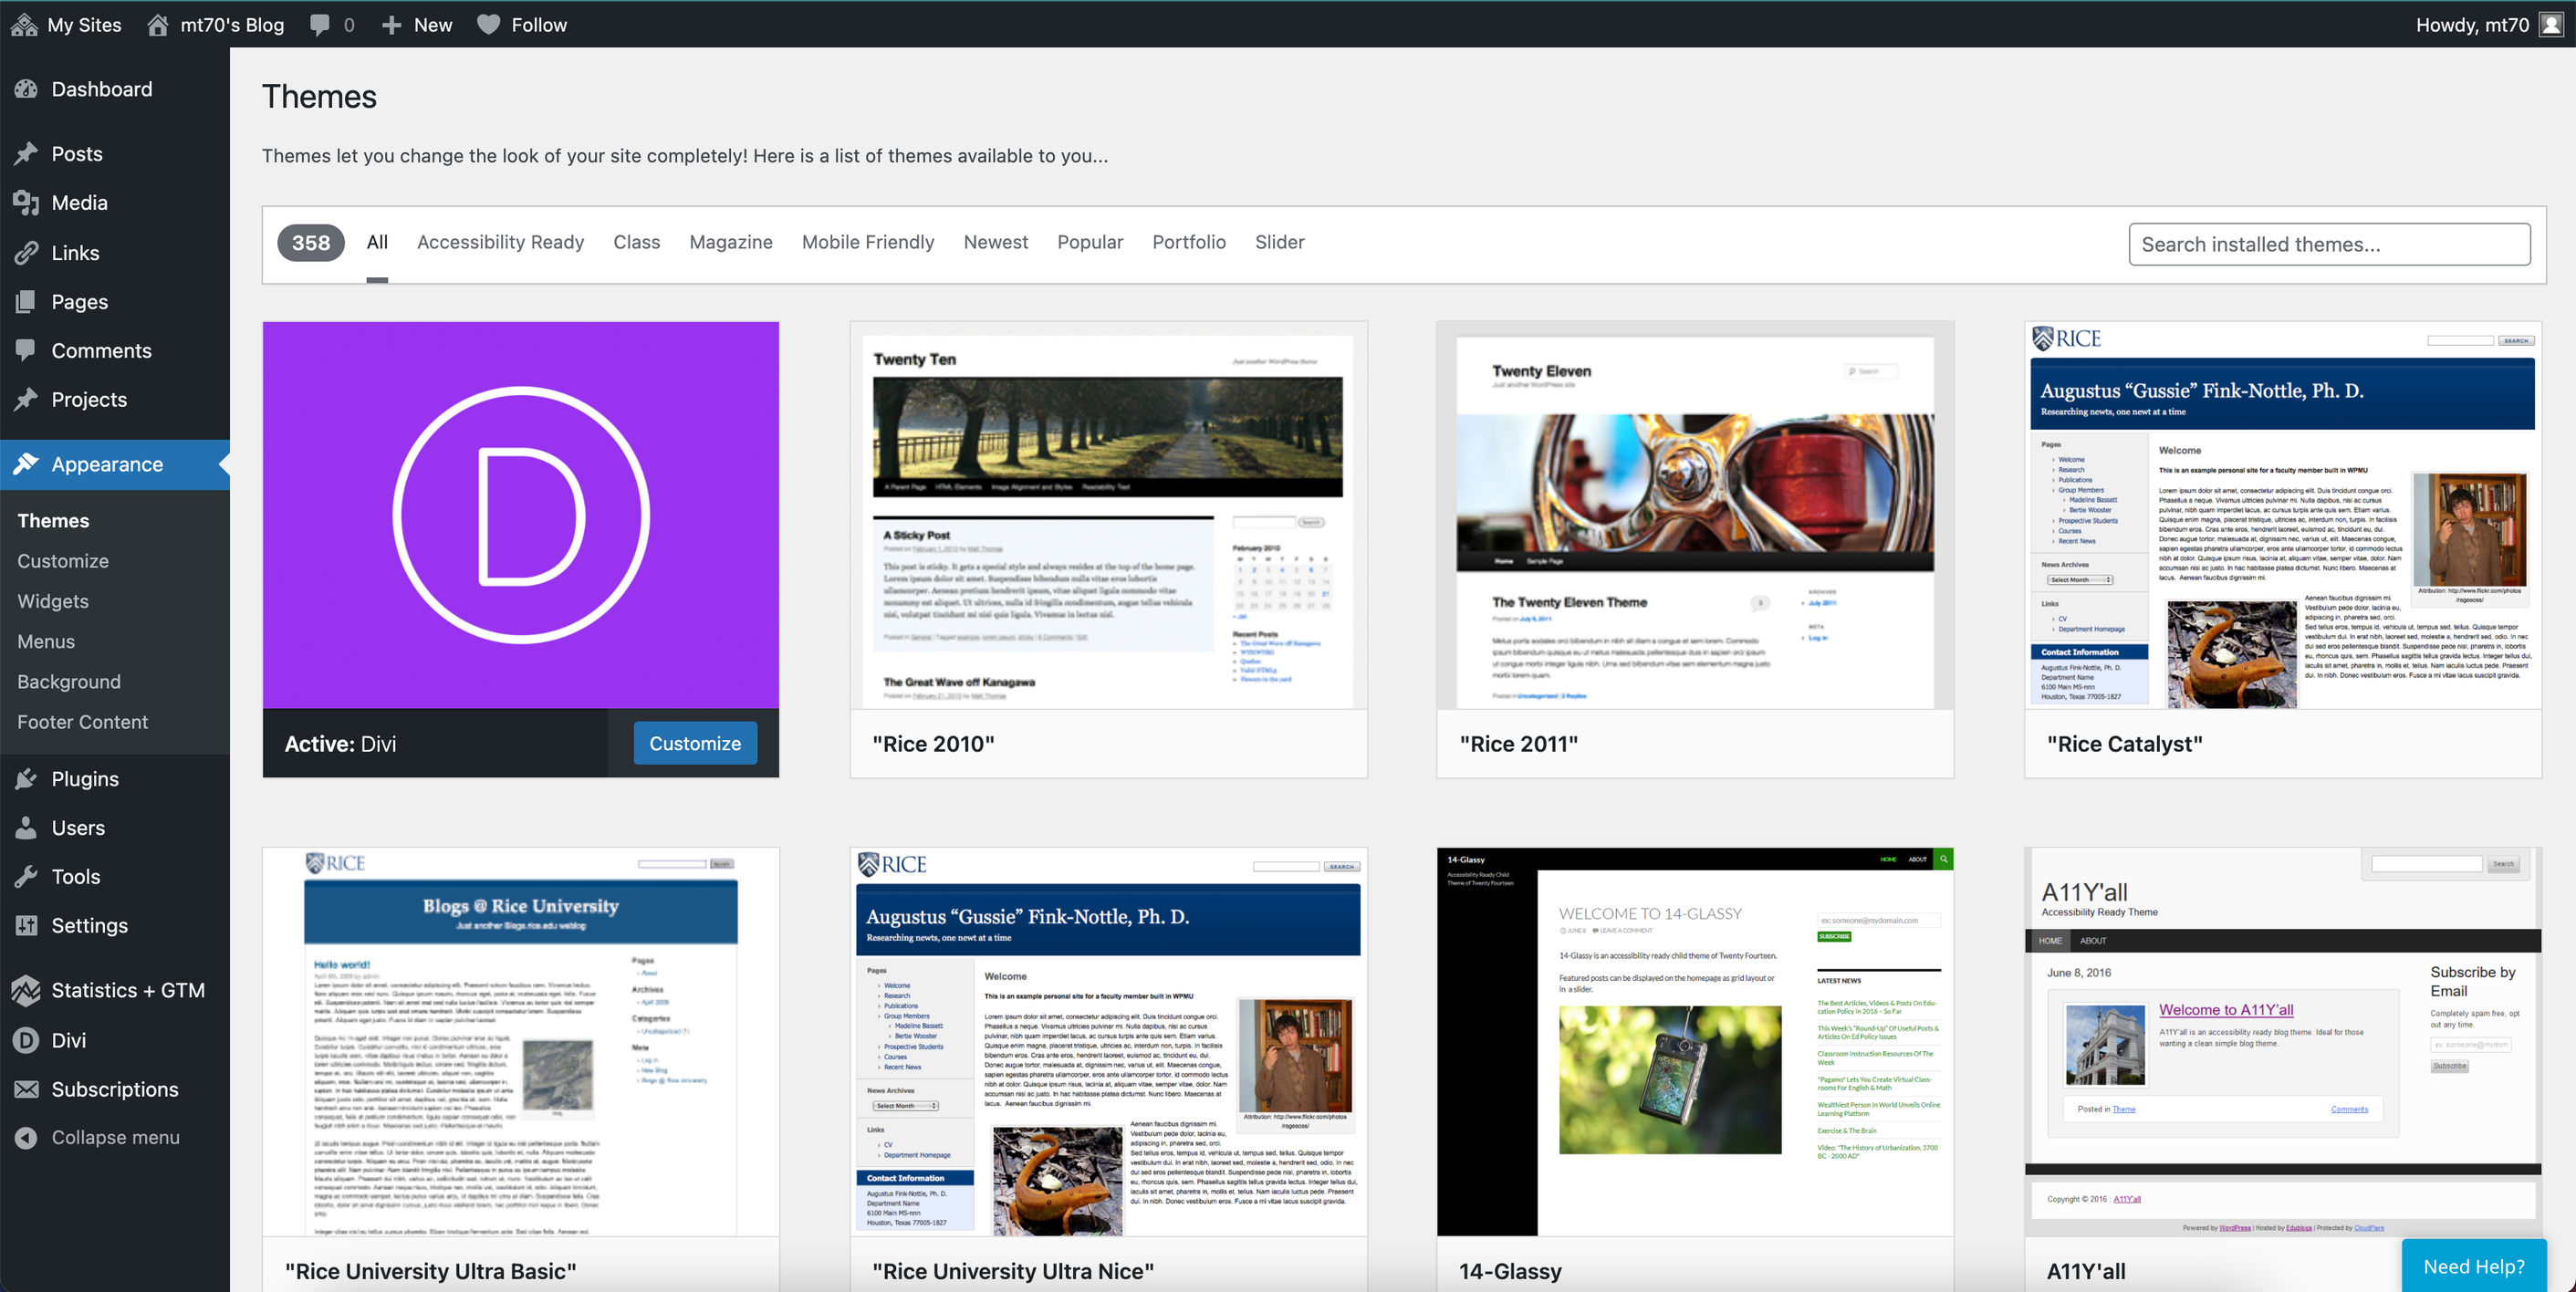
In Wordpress Themes, you can change the look and feel of your website.
Drupal
The majority of the content on your Drupal 8 site will be in the form of a “page”. This quick start guide will show you the major elements of adding and editing the page, how to assign an alias, creating a menu item and setting up metadata.
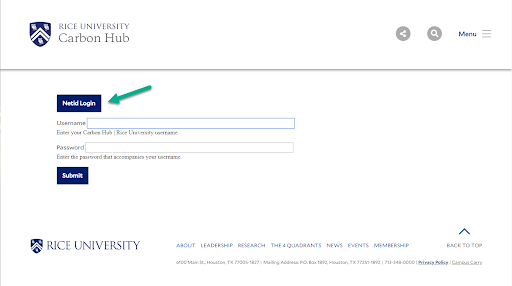
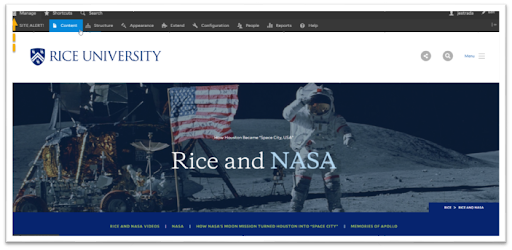
Step 1: Login to the site with your netid and password by going to the domain.rice.edu/user login URL. Note: The "domain" part of the URL will vary based on the website(s) you maintain. Click the blue “Netid Login” button, and at the login screen, enter your Rice Netid and password. Once logged in you will see the dark gray admin menu appear at the top of the browser window.
Step 2a: Browse the site as you normally would to find current content and then roll over the banner image where you will see a pencil icon appear. Click the icon and click “Edit’ from the menu that appears.
You can also find content this way:
Step 2b: In the Admin Menu at the top of the browser window click the “Manage” tab and then “Content” to display all the content in the CMS.

After you click “Content” the screen will change to a listing of all the content on the site where you can sort and search for a specific piece of content or type.
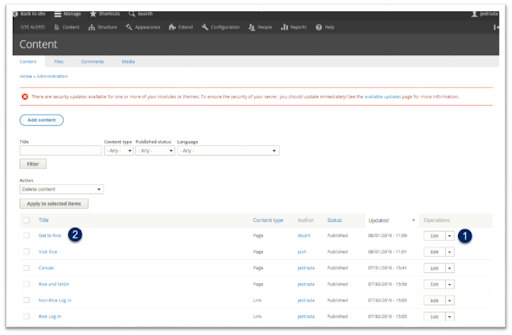
Once you find the content you want to edit you can view it in multiple ways:
- Click the “edit” button and this will open up the WYSIWYG editor in Drupal, or
- Click the title of the content “e.g. Get to Rice” and then follow the steps in 2a.
Step 3: The Drupal WYSIWYG editor – this is where you will edit the content of the page, this section is broken down into different parts to show you what each part controls on the page.
Title and Menu Area:
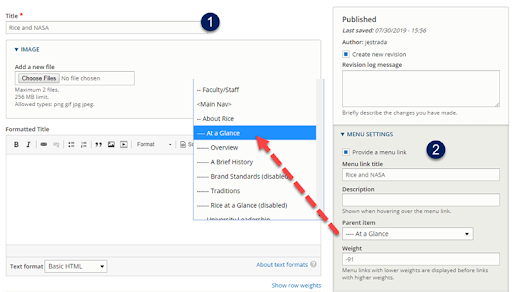
- Title: Place the title of the page here (this is what will show up in the search engines and in the tab on your browser)
- Menu Settings: This is what will display in the website main menu and at what level.
- If “Provide a menu link” is selected, you will have the following options:
- Menu link title – This will either replicate the title of the page or you can create a custom title for the menu.
- Description – only necessary if your title doesn’t make sense.
- Parent Item – This is where you can position the page with in the menu
- If “Provide a menu link” is selected, you will have the following options:
- Hero Image, Intro, Title and Body + Page Summary and Alias: The following area has multiple pieces to build out a dynamic hero image as well as set up summary for the search engines and alias to shorten the URL.
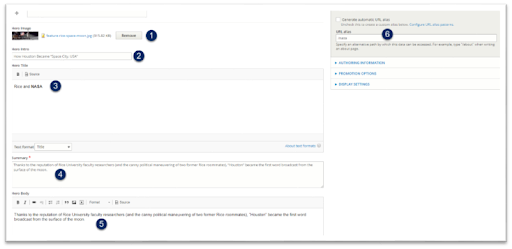
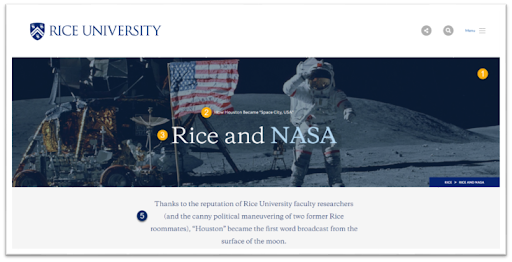
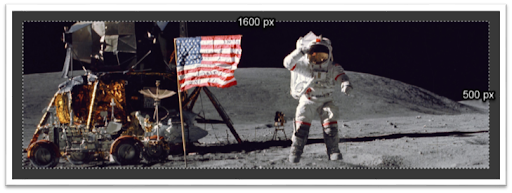
Hero Image: This is where you will add the image that displays in the top of the content. The dimensions for this image are (1500px wide by 500px high) – please compress the images in a program like Photoshop to be under 400k.
- Hero Intro: This is the intro text that goes above the Hero Title (optional)
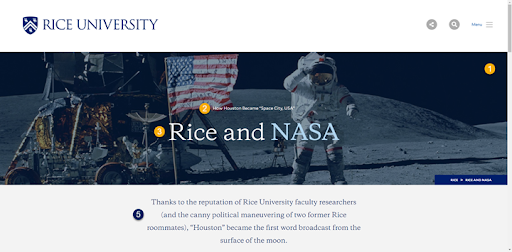
- Hero Title: This is the large text that is displayed over the Hero Image (Tip: You can add color to the text by bolding the word(s) – see example below )
Summary: This text is what the search engine uses to display under the title of the page in its results; it is also used in the preview for social media platforms such as Facebook and Twitter) - Hero Body: This text is what shows up under the Hero Image and is separated from the main copy with a gray background. This can be used to emphasize what is in the Hero Image or a lead in to the Body copy that follows.
- Body: Main content to the page. This area will also allow you to caption images, add pull quotes and embed other elements in the copy of the page.
- Quick Links: These links appear below the Hero Body in a blue bar. These links are used to link other internal or external content to the page.
- Category (Advanced)
- Tags (Advanced)
- Publish
- Meta Tags (Advanced) are snippets of text that describe a page’s content; the meta tags don’t appear on the page itself, but only in the page’s code.
Site Alert!
The SITE ALERT! Allows the website administrator to broadcast a special message across the top of their site. In the event of a university wide emergency this area will be automatically updated by the university crisis management team.
Step 1: Login to the site with your netid and password by going to https://www.rice.edu/user/login.
Step 2: Click the “SITE ALERT!” menu item and it will take you to “Home >> Administration >> Configuration >> System >> Bootstrap Site Alert Configuration”. Below there are 3 areas the user should focus on when updating the alert system.
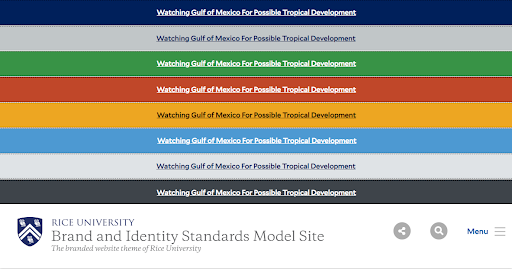
- Severity: Select your severity level: (examples below)
- Primary
- Secondary
- Success
- Danger
- Warning
- Info
- Light
- Dark
